If you’re running into graphical problems with your computer, ruling out a driver problem is a great first step in troubleshooting your PC. If you’re running the latest version of Windows, here’s a quick look at how to reset graphics drivers in Windows 11, from a quick restart to a full reinstallation.
Resetting your graphics driver can take just a few seconds and be super quick, but if it involves reinstalling, that can take a little longer and is a little more complicated.
How to restart your graphics driver in Windows 11
If your PC appears to be working fine, but the visuals have frozen, or you’ve had a sudden black screen but the PC seems to be working otherwise, you might need to restart your graphics driver.
Step 1: Press Windows key + Ctrl + Shift + B.
Step 2: Your screen(s) will flash black (if they aren’t black already) as the driver refreshes.
If it worked, you should find your PC is working again. If this problem persists, you might want to consider reinstalling your graphics driver anyway.
How to reinstall your graphics driver on Windows 11
The best way to reset your graphics driver in Windows 11 is by reinstalling it. If you have an AMD, Nvidia, or Intel graphics card, skip to the section below. However, if you’re running a Windows 11 PC with Intel or AMD onboard graphics, you can let Windows do all the heavy lifting for you.
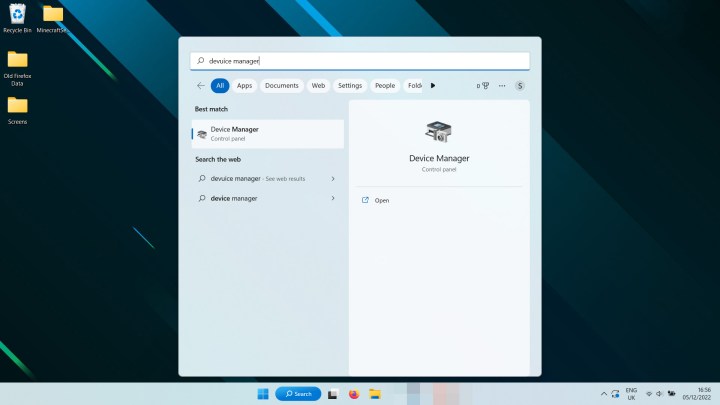
Step 1: Search for Device Manager in Windows search.
Step 2: Look under Display Adapters for your graphics chip. It will be listed as AMD Radeon, Intel UHD, or some variation.
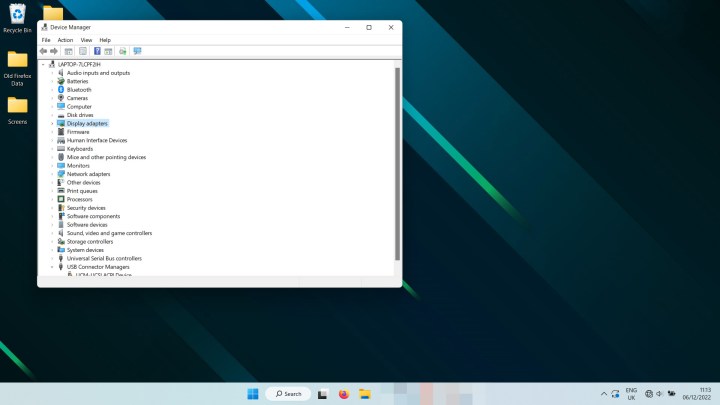
Step 3: Right-click on the entry and select Uninstall device. It may take a second and your screen may flicker off and on, but when it’s finished, restart your PC.
When Windows 11 boots back up again, it should reinstall the latest Intel or AMD onboard graphics driver for you, hopefully fixing whatever problem you were facing.
How to reinstall your graphics card drivers in Windows 11
If you have an AMD, Nvidia, or Intel graphics card, the process for reinstalling your graphics driver is a little more involved but not much more complicated.
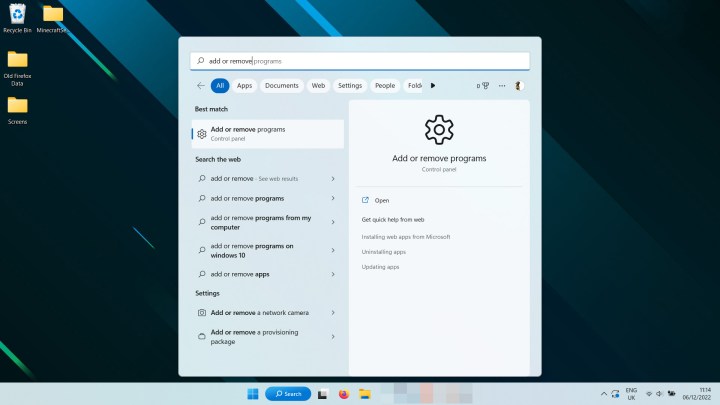
Step 1: Use the Windows 11 search bar to find Add or remove programs and select the appropriate result.
Step 2: Scroll through the list or use the search, to find Nvidia, AMD, or Intel graphics drivers. Select the three-dot menu on the right-hand side and select Uninstall.
You may also want to remove the GeForce experience, Nvidia Control Panel, AMD Radeon Adrenaline, and other related applications and drivers.

Step 3: Optional: If you want to make doubly sure that your drivers are completely removed, you can also run the third-party application, Display Driver Uninstaller, otherwise known as DDU. Find out how to download it and use it, on the official site.
Step 4: Restart your computer and wait for it to boot back up.
Step 5: Visit your graphics card manufacturer’s website and download the latest version of the most applicable driver for your graphics card. Their respective download sites are:
Step 6: Run the graphics card driver installer and follow the on-screen instructions to reinstall your graphics driver.
Now that you’ve reset your graphics drivers in Windows 11, how about improving gaming performance? Make these in-game settings tweaks to make the most of what you’ve got, or consider overclocking your graphics card to find more performance.
Editors’ Recommendations