
AMD has only just officially announced its next-gen Ryzen 7000 “Raphael” processors, and to keep the hype going, as well as to educate the future owners of a Zen 4 CPU, MSI has posted a video tutorial that shows how to install the new chip.
The tutorial, aside from being helpful, gives us a good look both at the chip and the socket. More importantly, it highlights just how easy it appears to be to install the new chip.
AMD isn’t just releasing the next generation of its CPUs — it’s also switching to a whole new socket after over five years of staying true to the AM4. This, of course, means a slew of new motherboards, and MSI is among the first manufacturers to reveal its upcoming lineup. The video, therefore, shows off an upcoming MSI motherboard paired with a Zen 4 CPU.
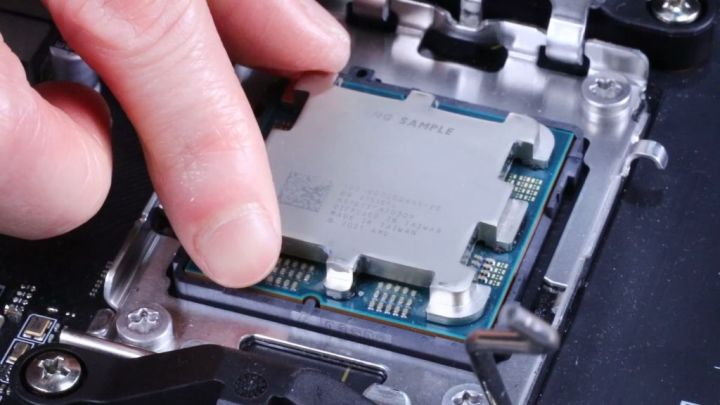
Many users might find the prospect of building a PC or even just installing a processor intimidating. However, it seems that AMD is headed in the right direction with its next-gen products, because the installation process looks really easy. The manufacturer has certainly made improvements that make positioning and placing the chip simpler to do, adding two notches as opposed to the small triangle that we’ve all grown used to by now.
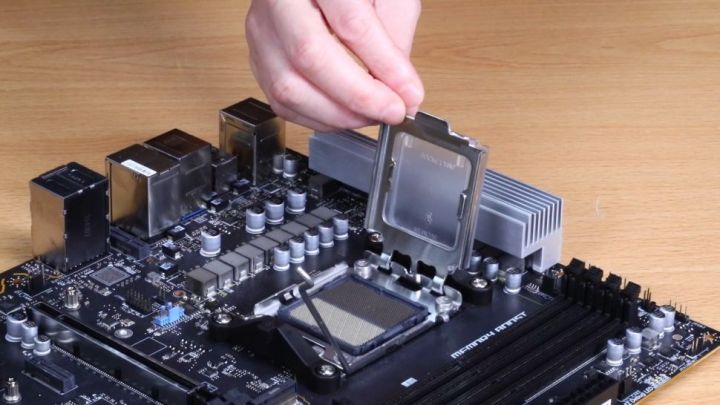
Right off the bat, an interesting detail comes to light — the socket cover is transparent as opposed to black. In terms of design, the AM5 socket resembles Intel’s LGA115x, so if you’ve ever tackled the installation of an Intel CPU, you likely won’t even need a tutorial of any sort.
According to MSI’s video, in order to install your new Zen 4 CPU, you’ll need to start by pushing the socket lever downward. This releases the load plate. The next step is to pick up the new AM5 chip using your thumb and index fingers. Looking closely at the chip, you’ll find that AMD has added two socket notches to the processor, making it easier to line it up properly. Lower it into the socket gently and slowly — don’t try to force it in.
Once you’re certain that the processor sits firmly and securely inside the socket, you can move on to the next step, which is lowering the load plate. Next, push the socket lever back. This will make the processor cover pop off on its own.
While the tutorial itself is helpful, what’s perhaps more interesting is the insight it gives us into the chip and the socket itself. AM5 brings a lot of changes and has a different design from chips intended for the AM4 platform. AMD has finally transitioned from a Pin Grid Array (PGA) design to a Land Grid Array (LGA) design. This means that the chips no longer have pins on the surface, just contacts, because the pins are inside the socket.
From an installation point of view, this is a good thing — you’ll no longer have to be concerned about the possibility of bending the pins on your chip. However, this doesn’t mean that you shouldn’t be gentle when you install a Zen 4 CPU, because you don’t want to bend the pins on your socket just as much as you don’t want to bend them on the CPU itself.
The AM5 socket comes with 1,718 pins, which is 18 more than Intel’s LGA1700 socket used for the Alder Lake processors. Intel is planning to also keep the same socket (and pin layout) for the upcoming next-gen Raptor Lake CPUs.
It’s worth noting that in the video, MSI paired the CPU with an AMD Wraith Prism cooler. The AM5 socket will continue to support AM4 coolers, which is nice if you’re upgrading, but realistically, a cooler is much cheaper than buying new RAM — which you will have to do because AMD Ryzen 7000 will only support DDR5 memory.
Tom’s Hardware was the first to spot MSI’s video, which has, unfortunately, been made private since then. Perhaps MSI is not quite ready to share the tutorial with the world just yet. However, there is still plenty of time — Zen 4 CPUs won’t launch until the fall.
Editors’ Recommendations