
The instantaneous delivery of email comes with consequences. Once you send an email, it’s gone and out of your hands. We all make mistakes, though, and Google gets it. To help out, Gmail includes a feature called Undo Send that allows you to cancel your send request. In the past, you had to manually enable it, but now it’s on by default.
Here’s how to make the most of it.
How to recall an email in Gmail for web
Gmail’s Undo Send feature only delays the email — it doesn’t actually recall accidental messages already sent to others. In other words, if you set the Send Cancellation Period to 30 seconds, Gmail doesn’t actually send the message until 30 seconds after you select Send. You can then use that 30 seconds to decide to and undo the sending of that email, essentially cancelling the sending of it.
After that, if you didn’t select Undo during that period of time, there’s nothing you can do but send a follow-up “whoopsie” email or wait for the response.
Here’s how to customize Undo Send:
Step 1: Sign in to Gmail on the web with your Google account.
Step 2: Select the Gear icon located in the top-right corner.

Image used with permission by copyright holder
Step 3: Select the See all settings button in the drop-down menu.
Step 4: The Undo Send option is located under the General tab. Select the Down arrow to select a delay in seconds from five to 30.
If you are worried about sending the wrong email, you probably want to set the cancellation period to at least 10 seconds, just to be safe. Five seconds isn’t very long to realize you made a mistake and react quickly enough to select the Undo button.
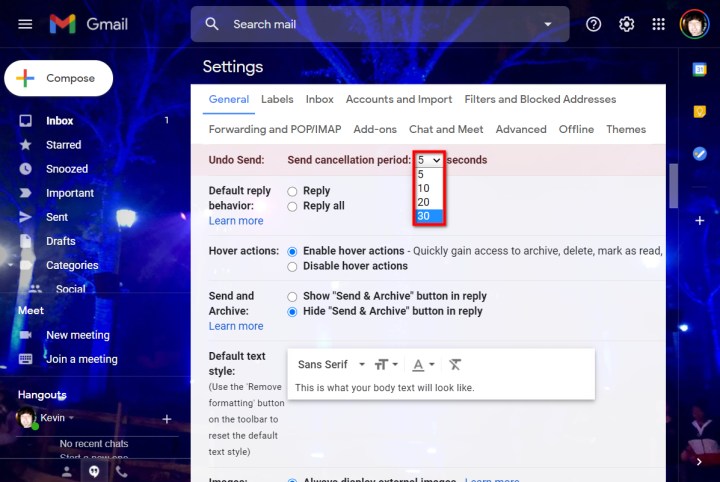
Image used with permission by copyright holder
Step 5: Navigate to the bottom of the Settings menu and select the Save changes button.

Image used with permission by copyright holder
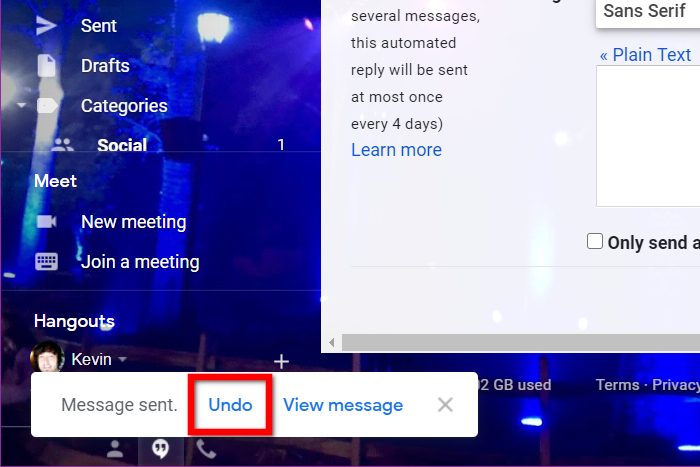
Image used with permission by copyright holder
How to send a test email and then recall it
Want to see this feature in action? Let’s give it a test run.
Step 1: With the Gmail web client open, select the big Compose button. You can’t miss it.
Step 2: Type your own email address in the To field. If you have another email account, use that instead.
Step 3: Select the blue Send button.
Step 4: A Message sent pop-up appears in the bottom-left corner, as shown above. Select the Undo link to recall/unsend the email.
Step 5: Your unsent email should now be on your screen as a draft. Adjust your message accordingly and send it, or delete it instead.
Unsending an email on iOS or Android is easy, and it doesn’t require adjusting any settings or options. The Send Cancellation Period is a predetermined interval that you can’t change as you would on a PC. On the Gmail mobile apps for Android and iOS, you’ll still follow the same steps outlined above in the previous section when using the Undo Send feature.
You’ll have a limited amount time to select Undo once the button appears on your screen. If you don’t select it in time, the message will be sent automatically.
Now that you know how to use Gmail’s Undo Send feature, you can not only avoid a costly mistake, but you’re also one step closer to being a Gmail power user.
Want to learn other ways to get the most out Gmail? Check out our guides on how to create folders in Gmail and how to use dark mode in Gmail on PC.
Editors’ Recommendations