
If you’re going to be away from work on vacation, a leave of absence, or something similar, you may want to set up an out-of-office reply in Microsoft Outlook. This lets others know that you’re away and won’t be responding for a particular time period.
The nice thing about automatic replies like this in Outlook is that you can schedule them for the timeframe you need. If you prefer, you can also turn the feature on and off manually.
Here’s how to set an out-of-office reply in Outlook on Windows, Mac, and the web.
Set an out-of-office reply in Outlook on Windows
You can create and schedule an out-of-office reply in the Outlook desktop app on Windows in just minutes.
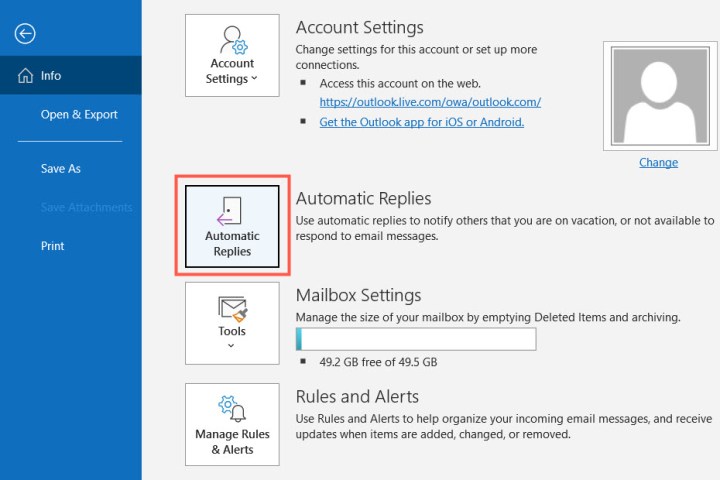
Step 1: Open Outlook on Windows and select the File tab.
Step 2: Confirm that Info is selected on the top-left. Then, click Automatic replies on the right.
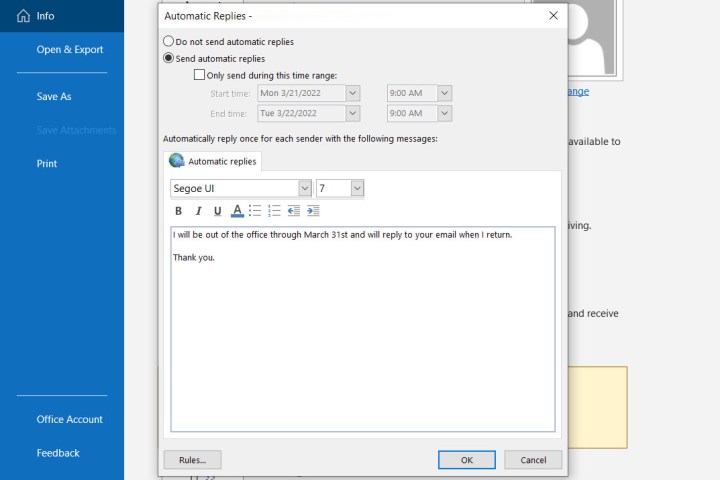
Step 3: At the top of the pop-up window, mark the option for Send automatic replies and then type your message in the text box at the bottom.
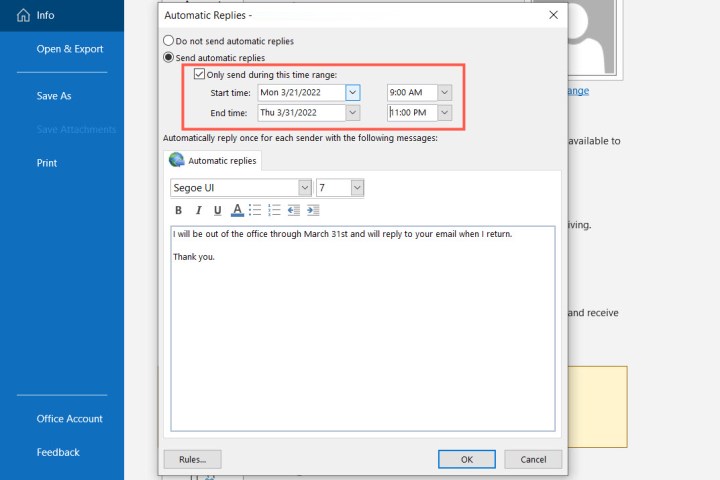
Step 4: To schedule the reply, check the box for Only send during this time frame and choose the start and end dates and times.
If you don’t select a timeframe, return to this spot to turn off the automatic reply manually.
Step 5: Click OK when you finish.
Set an out-of-office reply in Outlook on Mac
If you’re using the new Outlook on Mac, you can set up and schedule your out-of-office reply using the following steps:
Step 1: Open Outlook on Mac and select Tools > Automatic replies from the menu bar.
Step 2: When the Automatic Replies window appears, check the box at the top to enable automatic replies, and enter your message into the box directly below.

Step 3: To schedule the reply, check the box for Send replies only during this time period. Then, pick the start and end dates and times.
If you don’t use the schedule feature, return to this area to turn off the automatic reply manually.
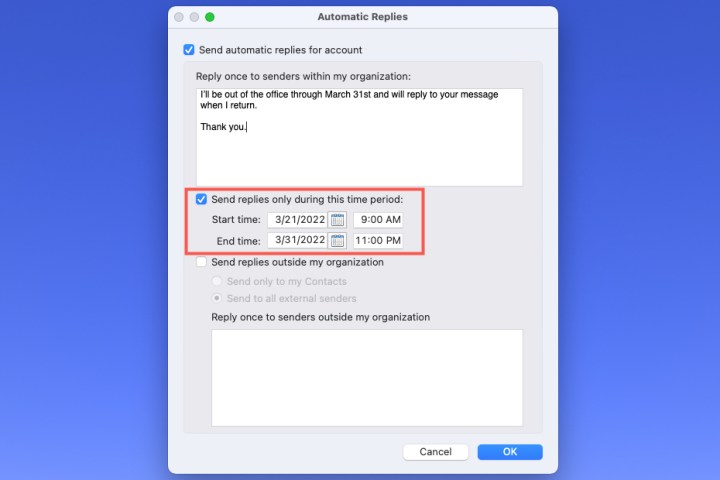
Step 4: To send the out-of-office reply to those outside your organization, check that box next. You can choose Send only to my contacts or Send to All External Senders.
Then, enter the automatic reply you’d like to send in that text box.
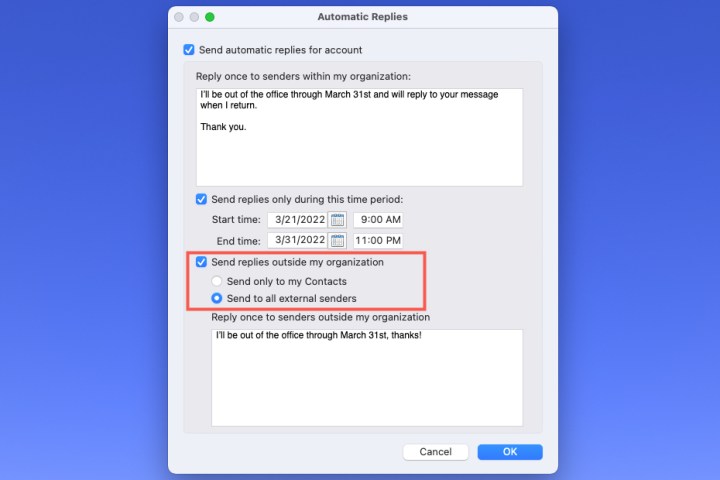
Step 5: Click OK when you finish.
Set an out-of-office reply in Outlook on the web
If you use Outlook on the web, it’s just as easy to create and schedule your automatic reply.
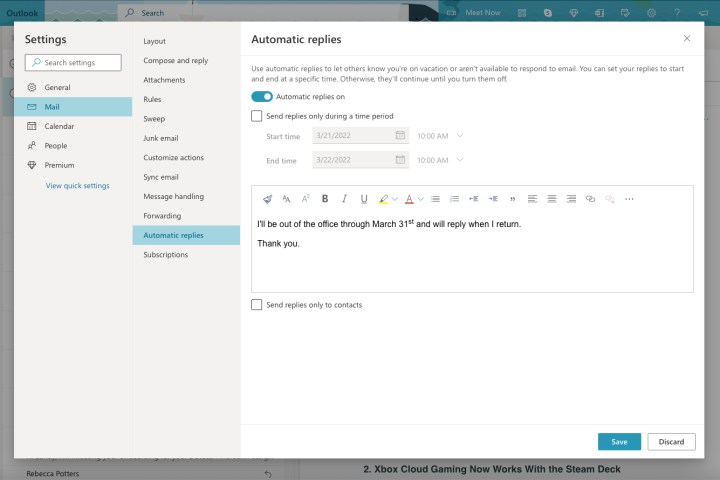
Step 1: Visit Outlook on the web and sign in.
Step 2: Click the Gear icon on the top-right and pick View all Outlook settings at the bottom of the sidebar.
Step 3: In the pop-up window, choose Mail on the far left and Automatic replies to the right.
Step 4: Turn on the toggle at the top and enter your out-of-office message.
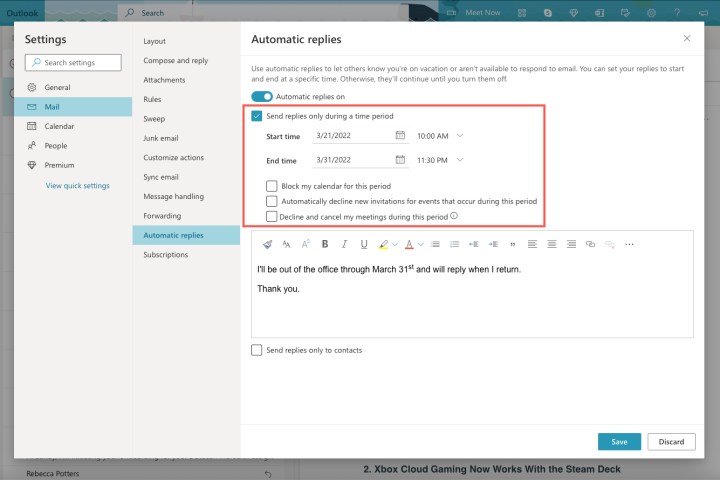
Step 5: To schedule your automatic reply, check the box for Send replies during a time period. Then, pick the start and end dates and times. Optionally, check the boxes that appear for additional settings that apply to Outlook Calendar during the timeframe.
If you don’t schedule your out-of-office reply, you can return to this location in the settings to turn it off manually.
Step 6: To send this automatic reply only to your Outlook contacts, check the box at the bottom.
Step 7: When you finish, click Save and the X on the top-right to close these settings.
Now that you know how to set up an automatic reply in Outlook, take a look at the application’s updated features or learn more things you can do in Microsoft Outlook.
Editors’ Recommendations